Category Archives: Attachments & Accessories

Elsie’s Bargain Basement – check it out!

Standard

IMG_7063

IMG_7077

Well, it’s finally happened – I’ve just finished listing loads of new stuff for sale.  Not only that, but we’ve also reduced the price of some items which are beginning to outstay their welcome, which explains why what used to be the Bits ‘n’ Bobs page has now turned into Elsie’s Bargain Basement!

While I was sorting that lot out, I checked out a few other UK suppliers of vintage Singer stuff just to make sure that we’re not getting expensive, and was reassured to find that we’re in much the same territory as the other sites for most stuff.   However, I must admit to being somewhat surprised by the asking prices elsewhere for buttonholers and zigzaggers in particular, so if you might be in the market for either, do take a look at our latest offerings.

By way of a break from all the uploading to WordPress I was doing and the research into pressure canners that Elsie’s been doing, we sloped off to the allotment this afternoon to get some greens for our poor chickens, who will very shortly turn into ducks if it doesn’t stop raining, and found that the tide was up …

Image0092

We’ve seen that path a bit wet before, but never quite like this!  Fortunately the spinach which constitutes Phyllis and Clarice’s winter greens is still above flood level under that glass on the left in this rather poor snap taken with my dumbphone.

And apparently it’s going to be raining off and on for the rest of this week …

The Singer Swiss Zigzagger 160990, carlessness and seven types of salad crop

Standard

If you’ve been hankering after a Singer Swiss Zigzagger 160990, permit me to direct your attention to the one I just listed on our Bits ‘n’ Bobs page.  It works a treat, and cosmetically both the attachment and its case are excellent.  However, the feed cover plate (which is the correct one!) has lost its chrome in a small area as can be seen in the picture to the left of the central slot (the smudge to the right of that slot is a greasy fingermark!), and this one comes without instructions or the cams needed for the fancy stitches.

Having said that, the Swiss zigzagger does a very nice variable-width zigzag stitch with just the built-in cam, the instructions are on the interweb, and this one’s listed now at about half the price it would be with cams and book of words.

If all goes well, the next post should be all about the 1933 Singer Illustrated Catalogue and Price List which Syd was kind enough to leave with me for scanning when he and Carol came to pick up some stuff from us on Thursday.  As they drove off, it occurred to us that in another week or so, we’ll have been carless now for three months – and the only time we’ve really noticed was when I had a hospital appointment which meant a bus trip there and back!

It would probably be interesting to work out how much money that’s saved us so far, but … erm … neither of us can be bothered to do the calculations.  I can though tell you that it looks like by the time we’ve had our electric bikes a year, I’ll have done well over 1500 miles on mine.

And that leaves us with the seven types of home-grown organic salad crop which Elsie announced were on her plate at lunchtime today.  There was lettuce (A foglia di quercia, since you asked – cheap seed from Lidl), American Cress, Mizuna, Green In Snow, Komatsuna, Southern Giant and Winter Purslane, which I personally don’t think is bad going for well into November at this latitude.  That all went with the lovely organic eggs from Clarice and Phyllis, and some halfway-decent inorganic tomatoes from Lidl now that ours are finished.

Being the more conservative member of the household where greens are concerned (he means faddy – E), I stuck to my lettuce as usual.  And seeing as how you’re obviously now anxious to know, that was followed by delicious bread buns made from home-ground organic spelt grain, yeast, water and salt, baked free of charge on top of the woodstove, with, in Elsie’s case, the stinky kipper fillets in something disgusting which she eats from time to time.  Why she eats that stuff when she could eat good wholesome organic cheese like I do, I have no idea.

Having said that though, I’ve no idea why Elsie insists on growing Jerusalem artichokes every year but she does, and she’s just now wandered down the garden in the rain intent upon putting a wheelbarrow full of the things into store.  Horrible things, Jerusalem artichokes.  Artichokes, fartichokes …

Instructions for Singer Automatic Zigzagger 160985 or 161102 or 161157

Standard

Well … I’m feeling rather chuffed with myself this fine Autumn afternoon.  Not only did I manage to retrieve the scanner lead from behind a couple of dead 401’s, but I also finally managed to master the technology and produce a reasonably-sized PDF of halfway-decent quality from a bunch of JPGs!

Whether or not I can remember exactly what I did this time when I next want to do something similar remains to be seen, but who cares?  Here, for the convenience and delight of anybody who acquires a Big Black Zigzagger with no instruction book is exactly what the interweb’s been waiting for …

Instruction book for Singer Automatic Zigzagger 160985 or 161102 or 161157

That’s actually the book for the 160985 (and the 160986 if you’ve got the slant-needle version for the 301), but the instructions are exactly the same for the 161102 and 161157.  The detail differences between the models have no bearing at all on how you use them.

So there you go. And if that PDF saves you a few pounds/dollars/rubles or whatever, may I just say that if you’d like to express your appreciation by making a small contribution to The Blog Fund by means of a PayPal gift to sidandelsie at btinternet.com, that would be much appreciated.  As Tesco says, every little helps!

How to fit a handcrank to an early Singer 27K treadle

Standard

Here’s a picture of the drive end of Elsie’s old faithful 27K, which was made in 1900 and still resides in the ornate drawing room cabinet* in which it left the shop 112 years ago.

Now, if you’re really into the old Singer stuff, I bet you got as far as “made in 1900” in that sentence and immediately said to yourself “Ahah!  So it hasn’t got a boss for a handcrank!”.  And if you did, I bow down before your awesome knowledge of such arcane stuff.

If you didn’t, and you’re not entirely sure what a “boss” is in this context anyhow, look closely at the right-hand side of the column of this particular 27K, and hopefully you’ll be able to see that there isn’t the usual sticky-outy bit to which a hand crank or indeed a motor can be fitted.  That’s the “boss”, or rather it would be if this machine had one.  Later 27K’s do have one, but only a real vintage Singer geek could tell you when they changed from bossless to bossed.  The best I can do is say that in 1900 at least some 27K’s didn’t have a boss but by 1903 they all did.

So, should you wish to fit a hand-crank to one of these fine old treadle machines, how might that be done when there is no apprarent means of attaching one?  In theory it’s easy – all you need is Hand Attachment 81712, as shown below together with a bobbin winder assembly which wanted to be in the picture too …

Once you have your Hand Attachment 81712 to hand, as it were, it’s simply a case of undoing one screw and removing the belt guard from your early 27K, then fitting the handcrank by clamping its mounting bracket round the collar onto which the belt guard was originally fixed.  It’s a job which requires nothing more than one ordinary screwdriver and five minutes of your time.

The problem is of course that you first need to acquire your Part No. 81712.   Which was only made for the very early 27K.  And then apparently not in any great quantity.  So they’re a bit thin on the ground.   I’ve no idea how many of them Singer actually made, but I do know that the Hand Attachment had been officially declared obsolete by 1906, so it’s perhaps not surprising that 105 years later, most folk have never heard of it.  Certainly this is the only one that Elsie and I have ever actually laid hands on.

Given its rarity, it’s got to be a symptom of something or other that having completely forgotten we had this one, I found it yesterday under a pile of stuff alongside the dead printer which I’d finally decided to take down to the dump recycling centre.  Be that as it may, given that Elsie’s 27K in the drawing room cabinet is in its original state and it’s such a delight to treadle, there’s actually more chance of me mastering the art of knitting than there is of us ever needing to use this particular bit of kit, therefore one complete Hand Attachment 81712 is now listed on our Bits ‘n’ Bobs page!

So now somebody, somewhere is wondering “OK, that takes care of a handcrank, but how do you fit a motor?”.  The answer to that is “with great difficulty”, which as far as I’m concerned is just as well because I really can’t imagine why anybody might want to vandalise a very early 27K by motorising it …

And … just as I was about to publish this post, an email came in from Lulu alerting me to a listing on Ebay UK of a rather unusual treadle machine …

I was interested to see that the drawer pulls on this one are different to those on Elsie’s early drawing room cabinet, and that the mat on the treadle plate is a different design too.  The real surprise though is the 28K.  I’ve never seen a 3/4-size machine of any flavour in a drawing-room cabinet before.   It’s obvious from the other pictures in the listing for this one that it’s a DIY job and an old one at that, but I can’t see why it wouldn’t work just fine.  And I love the way the handcrank’s still on it …

* If you’re in the US of A,  for “drawing room cabinet” read “parlor cabinet”.
Edited 2nd October to add – thanks to Linda and Heather, I now know that Singer did indeed supply the 28K in a Drawing Room Cabinet!

Singer zigzag attachments and a 99K on a bike

Standard

“I’m just off down to the dump with the remains of a 99.  Won’t be long” says I to Elsie, who came wandering up the garden path so we could go through the ritual “Have you got your phone, keys, hankie, wallet, teeth …” routine.  But this time, she pointed out that whereas it’s perfectly normal for us to take a dead sewing machine to the dump recycling centre on the back of a bike, it’s not exactly a mainstream activity, so maybe this should be immortalised on the blog, whereupon she went and got the camera.

So now you know what that picture’s about.  Anyhow, if carrying a vintage Singer on the back of a bike is a bit unusual, I guess that taking two of them to the dump in a trailer behind a bike is really peculiar, so we’ll try and remember to take a snap or two next time I do just that.

Moving on now to Singer zigzaggers, and specifically the big black ones, I listed a 161102 for sale on our Bits ‘n’ Bobs page yesterday for which we had a buyer within 4 hours, but we hope to have another good one ready next week.

Mention of the Bits ‘n’ Bobs page prompts me to explain that we’ve changed it back from “Accessories” on account of I changed it from “Bits ‘n’ Bobs” to “Accessories” when I added the “Parts” page a few months ago, but as I never got round to getting the parts page off the ground, it’s gone now and we’re back as we were.  Keeping it simple is always good.

Talking of bikes, and seeing as how it’s a Friday, here’s something a little different …

Have a good weekend, folks.

Instructions for Ruby Buttonholer and Vanguard Buttonholer

Standard

I only found out today that if the fates deal you either a Ruby or a Vanguard buttonholer with no instructions, the interweb is not a lot of help to you, so in an effort to rectify that situation, here we go with a crash course …

The common Ruby Buttonholer (the “Type R-B”) might be a different colour to the Vanguard Buttonholer, and it may or may not have an extra adjustment on it, but they’re essentially the same thing so the following instructions apply to both.  Note that your Ruby might have with it a chromed steel queerthing about 2″ long which has TA(103) stamped on it, but don’t lose any sleep over that.  It’s just an alternative means of attachment which was provided for fitting a Ruby to an industrial sewing machine.  Quite why the guys in Japan imagined anybody might ever want to do that is way beyond me, but they did.

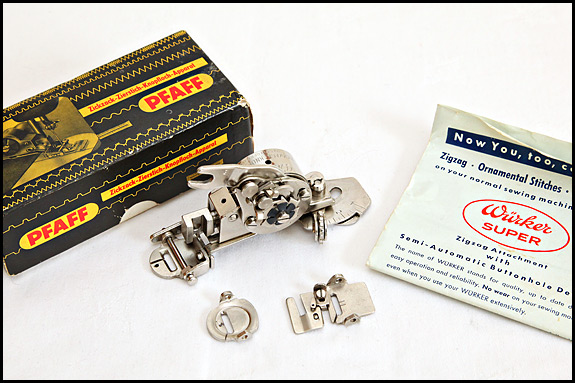
Buttonhole attachments for straight stitch machines all work by feeding the material relative to the needle in such a way that a zigzag stitch is formed in the pattern of a buttonhole.  The needle stays put and goes straight up and down same as ever, but the fabric under it goes pretty much all ways at once.  To use these things, you need either to drop your feed dogs or cover them up, so your buttonholer should come with a chromed steel cover plate and the fixing screw for it.  If it didn’t and your machine won’t let you drop the feed, any cover plate which fits should work, as long as the needle will centralise in the hole and the plate will stay in place.

OK, on to the device itself.  The red knob on the top of it is what you turn in order to make it do its thing when it’s not on the machine.  Turn the red knob clockwise and the moving parts will cycle through the full range of movements used to produce a buttonhole.  Turn it anti-clockwise and all that will happen is that it will eventually come off, but helpfully, an arrow is provided for those who have never been good with clock and anti-clock.  It might have been more helpful still to make the head of that arrow far more obvious than it is, but apparently we should always be grateful for small mercies.

With most of the Ruby/Vanguard buttonholers, you can set three variables – stitch length, buttonhole width and buttonhole length – but sometimes you can set four.  Gosh.  How exciting is that?  I don’t know, but let’s look at each adjustment in turn …

The stitch length lever can be set to any position between “W” and “N”, and that setting determines how many zigs and zags per inch.  All the way to the “W” gives you a really ziggy-zaggy stitch, all the way to the “N” gives you more of a satin stitch, and no, the logic of using “W” and “N” for those markings is not obvious to me either.

The “buttonhole width” lever clicks into one of three positions, and as you might have guessed, it determines the overall width of your buttonhole.  “1” is the narrowest.

If you’re still in any doubt about what manner of gizmo it is that you’re playing with, that will now become obvious as we come to the setting of the length of your buttonhole.  For this you need both a screwdriver and a sense of humour.  See the screw that’s visible through the slot in the casing?  Yep, that’s your length adjustment, and it’s only really accessible when the planets are in the right conjunction.

OK, that’s not strictly true, but in order for your screwdriver to have any hope of turning that screw, you need to turn the red knob clockwise until the screw’s positioned itself more or less central under the slot in the cover.  Only then can you slacken it off, move it along the slot in the metalwork and re-tighten it.  If you hold the buttonholer with the slot towards you, you move the screw to the right of its slot for longer buttonholes, to the left for shorter ones.  In theory the middle of the slot gives you a buttonhole getting on for 3/4″ long, or around 18mm-ish on a good day.

So you now know what the three adjustments are, but not how you actually drive the thing.  Obviously we need to fit it to the machine, but first we need to either drop the feed or cover it.  If you have a thread cutter fitted, we then need to swing that round to roughly where the one in the picture below is, so as to ensure that it’s not going to interfere with the drive to the buttonholer.  Only then do we fit the buttonholer itself …

Now, the first time you try this, it will be fun.  I reckon you’re better off getting the hang of fitting it without a needle in the machine, but the general idea is that you end up with the slot in the end of the arm of the buttonholer over the collar into which your needle clamp screw goes, and the device itself fastened securely to your presser bar by means of the thumbscrew used for your normal presser foot.

If you’ve got it right, the body of the buttonholer should be square on to the bed of the machine, and just about level when the presser bar is raised.  When you cautiously turn the balance wheel towards you, you should see the needle clamp moving the arm up and down, and that in turn causing the buttonholer to strut its stuff.

Assuming all seems to be well, it’s then time to re-fit the needle if you removed it, and thread the machine as usual.  Before you start mass-producing buttonholes, though, try to contain your excitement long enough to turn the red knob until the needle is at one end of the buttonholer.  Makes no odds which end and it’s not strictly speaking essential, but it’s good for the soul. Then off you go.

Note that you’ll probably have to faff with your top tension a bit and maybe even your presser foot pressure.  And it’s usual to go round the buttonhole twice.  Maybe even three times …

And here’s the fourth adjustment, which may or may not be present on yours.  If it is, it enables you to vary the bight i.e. the width of the actual zigzag stitch which the buttonholer produces.  This time the “W” and the “N” make sense even to me, because they stand for “wide” and “narrow”.  The range of adjustment isn’t huge, but it doesn’t really need to be.

And that’s about it!  Neither the Ruby nor the Vanguard is as good as the 86662/86718, but once you get used to their peculiarities and their limitations, they do in fact make quite a decent buttonhole – certainly one that’s better than the auto ones on many modern machines.

One final thought, which actually applies to any buttonholer really, and also for that matter to zigzag attachments .  If you tend to “drive” the fabric as you’re sewing even though you know you shouldn’t, do try and train yourself to stop doing that!  Let the attachment do the feeding 🙂

Vintage Singer “Stitch Patterns” and Swiss zigzagger cams – cont’d

Standard

Elsie ‘s been rummaging about in The Sewing Room again and has discovered some spare red cams for the big black zigzaggers.  Funnily enough, I had a rush of blood to the head and a bit of a tidy up of my desk yesterday, and I found a few more of them lurking down the side of the printer, so I’ve added them all to the “Accessories” page.  So, if you need any red “Stitch Patterns” to complete either the standard set or the same-as-the-white-ones set (Set No.2, part no. 161008), drop us an email and we’ll gladly see what we can do for you.

That set of 10 cams for the Swiss zigzagger with the snail shell (160991) is probably for sale too, but frankly we’re still trying to decide what we want to do with it.  We normally just see if we can remember what an item cost us, then add a modest profit to cover our time doing whatever it took to get it ready for sale, but sometimes the figure we come up with does leave us wondering.

This set of Swiss cams is a good example of where our difficulty lies.  Given that anything which supplements my state pension is most welcome, common sense says we should do the obvious and put it on Ebay.  The problem is, though, that Elsie and I don’t see the blog and the sales we make through it as a money-maker (which is probably as well, because it certainly isn’t), so if we put it on Ebay, one of our readers will probably miss out.  And we’d be happier if that didn’t happen.

So what to do?  Who knows, but while we’re still prevaricating, if you fancy a perfect set of nice shiny cams for your Swiss zigzagger, you could do a lot worse than make us an offer for this one.

Anyhow … talking of Ebay and Swiss zigzaggers, we’re much obliged to Alice for drawing our attention to three that sold recently on Ebay UK.    The first of those was a 160991 with a full set of 10 cams, a less-than-perfect snail shell, no instruction book and an 86663 feed cover plate (complete with clearly visible rust) instead of the correct one.

The second was a 160990 with its instruction book and the correct set of 5 cams, but its box was broken and it too had an 86663 cover plate, albeit one seemingly without the rust.  Lest you be wondering, the significance of the 86663 is that it’s the really common cover plate that was supplied with buttonholers like the 86662, and although it’ll work OK with the zigzagger, it won’t fit in its box!   Only the correct one will.  That’s why the Swiss zigzagger cover plate is unique to it.

The third example was what looked to be a very nice 160991 complete with good snail shell and all its cams.  This one didn’t have its instruction book, but it did have the right cover plate.

Now, what I found most interesting about those three Ebay listings was firstly that a seller’s happy to sell, and buyers are willing to buy, a Swiss zigzagger with a cover plate which won’t go in the box.  Next, neither Elsie nor I could confidently have said which of those three would go for the lowest and for the highest price.

And we certainly wouldn’t have predicted that they would sell for £100, £114 and £137.93 respectively …

Vintage Singer Zigzagger cams or “Stitch Patterns”

Standard

Why “Stitch Patterns” I have no idea, but that’s what the cams for the big black zigzagger are called.  The cams for the Swiss Zigzagger, however, are called “cams”, and if you’re wondering where this is leading, all is about to be revealed …

So we have here a picture of the Stitch Pattern set 161008 which I listed on our “Accessories” page yesterday, and it is of course for the Singer Automatic Zigzagger a.k.a. Big Black Zigzagger.  That Big Black Zigzagger can be a model 160985, or it can be a 161102, or indeed a 161157, but they’re the same dog with different spots so it makes no difference here.  As long as it’s big, it’s black, it says “SINGER” on it in gold and it’s a zigzagger, it’ll take those Stitch Patterns.  And hereinafter “Stitch Patterns” will be “cams” because just I can’t be doing with the “Stitch Patterns” all the time.

Now, if you have your very own Big Black Zigzagger, you may well be thinking “Yep, mine came with one of those red cams in it and the other three were in the box”, and you might wonder what was the point of those same cams also being available as a boxed set.  Well, they weren’t.  These red cams are different from your red cams, because your red cams are the red red cams and these red cams are the red white cams.

Confused?  I was too at one time, but it’s actually easy enough to get your head round if you take it slowly.  In the beginning, to coin a phrase, was the Big Black Zigzagger, and it was sold with four red cams.  Those cams are numbered on the back 161000, 161001, 161002 and 161003 and they make stitches called zigzag, blind, domino and arrowhead respectively.

If you turn to page 20 of your Singer Automatic Zigzagger instruction book, you will see that “Additional stitch patterns may be purchased”.  Gosh.  I wonder just how exciting that prospect was in 1955.  Whatever, those additional cams are numbered 161004, 161005, 161006 and 161007, they make stitches called scallop, multiple, walls of Troy, and icicle respectively, they are also red and the part number for the set of four is 161008.  That’s it in the picture.

I don’t know what’s with the “walls of Troy” either, but I do know that the confusion starts with this set, because the cams in it are painted the same red as the four which came with the zigzagger.  No doubt it made sense at the time to have eight different cams all the same colour, but before long Singer decided to introduce first one then two further additional cam sets, and obviously a total of sixteen different red cams would hardly be user-friendly, even if the term had been invented by then.

So what did Singer do?  They did about the only thing they could do, really.  They got some different paint.  The next cam set on the market, which if you start counting from the the standard set was the third, is called Set No. 3.  It’s part number 161076, the cams are numbered 161067 to 161070, and those cams are blue.

The next set to be introduced is called Set No. 4, the part number for it is 161077, the cams are numbered 161071 to 161074 and they are yellow.  So including the standard four cams, that gives us two different red sets, a blue set and a yellow set.

Wait for it …

They then changed the colour of the first additional set from red to white, and called that Set No. 2.  But they didn’t change the numbers on the underside of the cams, and neither did they revise the accompanying leaflet!  This explains why Elsie’s Set No. 2, which I have in front of me as I type, has a red cam on the front of the leaflet, and contains four white cams which are identical to, and numbered the same as, the four red cams in the set in the above picture.

Fascinating though this may be, you’re no doubt eager to learn now the relevance of it to those of us into vintage Singers, so here you go.  If you’re a completist, you need Set 161008 as well as the blue, yellow and white sets because Set 2 is the one referred to in the zigzagger instruction book.  But if you just fancy an extra cam set for the fun of it, that red white set is (or at least ought to be) cheaper than the white white set.

More about red cams as well as yellow ones and about those for the Swiss zigzagger too in another post, but while I’m on the subject of Set No.2, if you know for sure what its part number is, we’d love to hear from you because neither the box nor the leaflet tells us!

Edited to add – Thanks to Heather, we now know that Singer didn’t change the part number when they changed the colour of the red white set.  The white white set is 161008 as well!

The Needle-Art Embroidery Guide – continued again!

Standard

Heather who does the “Edsmum” blog has kindly pointed out that there’s a rather nice Featherweight attachment box (the little-suitcase-type one) up on Ebay now which among other things has in it a Needle-Art Embroidery Guide.  Not only that, but it’s a “blackside” one!  And you can read the first digit of the number on it, so I’ve corrected my original post accordingly.

So, if you’re a Pheatherweight Phan, you don’t have the case, and you don’t have a Needle-Art Embroidery Guide, good luck with listing number 160831922516.  Note that it finishes on 1st July, it’s in the US, and the seller states “no international bids”.

(Come to think of it, if you are a Pheatherweight Phan, can you solve a little mystery for me?  Why on earth are the black attachments always called “blackside” rather than just plain “black”?)

The Needle-Art Embroidery Guide – cont’d!

Standard

OK … my post about this little gizmo has got quite a few people wanting one.

A couple of readers have also realised that they actually have one (they didn’t have the instructions for it, so had no idea what it was), but unusually, nobody’s yet come up with any more information about Jeanne Sherman of PO Box 1, Tahoma CA and whether she made any other useful things.

So … if any of you good people are on any sewing forums or suchlike, could you perhaps do us a favour and post a link there to my previous post, and ask if anybody knows anything?  If you manage to find out anything, do please let us all know via a comment under this post.

Thanks!