Category Archives: Singer 201 (early and later models)

A vintage Singer 201K leaflet

Standard

201_a

This is another of Syd’s leaflets which he kindly let me scan a week or two ago, and it’s another one which we hadn’t seen before.  I’ve no idea of its exact date, but a pound to a penny says it’s the second half of the 1930’s.

201_bAt top right of the centre pages we see the stitch length regulating lever in its vertical slot, and to its left the thumbscrew which invariably baffles folk who are new to the 201 and haven’t read the book of words.  The text below that picture explains the mystery …

Perfect stitches of a desired length are made either forward or backward, by movement of the lever “B”.  The figures alongside the slot indicate the number of stitches per inch that the machine will make.  When the top of the lever is moved level with any one of the  figures shown, and the screw “A” is raised an tightened, the machine makes the length of stitch wished for in a forward.  By moving the lever up, as far as it will go, the same size stitch is made backward.

Or, translated for the benefit of readers not used to Singer’s idiosyncratic way of explaining things …

Lever “B” sets the stitch length.  As shown it’s set for the longest stitch, and for normal forward stitching.  As you move the lever upwards in the slot, the stitch length gets shorter and shorter until the lever’s level with that line over the numbers.  At that point, the stitch length is zero, so the work doesn’t get fed under the presser foot.  Keep moving the lever up and you’re in reverse, with the stitch length gradually getting longer.  When the lever’s at the top of the slot, the stitch length is the same as it was when the lever was at the bottom of the slot, but you’re sewing backwards.

The thumbscrew and that curved slot is the clever bit.  Let’s say we want to sew roughly 12 stitches per inch.  We move lever “B” upwards until the top of it’s level with the “12” marking, and off we go.  If we’re happy with that length of stitch, we can then slacken the thumbscrew “A”, move it up that curved slot as far as it’ll go, which won’t be very far, and then tighten it.

Having done that, if we then move lever “B” upwards, we find that it won’t go all the way up to the top of the slot.  It now stops at “12”.  That’s because by moving the thumbscrew like we did, we’ve set the stitch length the same in both forward and reverse.

And that’s all there is to it – the thumbscrew is the means whereby you can set it so that when you want to back-tack or whatever, you just pull lever “B” up as far as it’ll go, and continue sewing with the same length stitch but in reverse!

201_c

Top picture on the back page explains feed dog drop, but it’s the wording immediately below the bottom picture that I think is lovely and so very much of its time …

View of the Machine head illustrating its particularly chaste ornamentation

Next week we’ll probably be looking at the third and final one of Syd’s brochures, plus what may or may not be some fascinating facts about the Singer building in London town and what used to be the Singer shop in downtown Tunbridge Wells, whence came this very leaflet we’ve just been looking at.


Singer knee lever – how it fits in the bentwood case lid of a 201K

Standard

Or the domed lid, as some say.  I’ve even seen it referred to as a doomed lid.  But whatever you call it, Polly was confused by hers.  She’d bought a knee-lever 201K in a bentwood case, and wondered what she was supposed to do with the lever when she’d finished sewing and wanted to pack the machine away.  Somebody had told her it clipped into the lid, but Polly couldn’t see how.

To cut a long story short, it turned out that although Polly’s bentwood lid fitted her base properly, it wasn’t actually the right lid for her machine.  It wasn’t a knee-lever lid, so it didn’t have the appropriate hardware.  We got there in the end, but it would have been a heck of a lot easier if I could have found these pictures that I took ages ago.  But I couldn’t.

However, a minor miracle has occurred and I have now, so just in case it helps anybody else to know, here’s a concise guide to what should be in the bentwood lid of your knee-lever 201K …

In the picture above, we see the lever held in place inside a kosher lid.  The machine end of it’s in the bracket on the case end, and the knee end of it’s clipped to the top of the case.

That’s a clearer picture of the fitting, and it also shows the wire clip for the box of attachments.  And by the way, a Godzilla box does not fit in that clip – it’s meant for the green cardboard box which measures about 6 x 2.5 x 1.5 inches.

Hopefully you can now see clearly how that clip works, and also that it’s held in place by one of the nuts which secure the handle to the lid.

And while we’re at it we might as well do the extension table fittings, because it’s not exactly obvious how they work.  That grey thingy towards back left in the picture above is part of the answer, but the curly black wire at bottom right is nothing to do with it.  That’s the clip for the oil can.

That’s how the extension table fits in one of these cases.  It goes in with the bit of wood with the two screws facing inwards, and the metal tongue thingy which is on that end of it engaged in the grey metal doo-dah on the end of the lid.  With a bit of jiffling and a modest amount of luck, the extension table will then sit close enough to the side of the case for you to be able to swing the metal catch over the corner of it, which should keep it safely in place.

Having said that, bearing in mind all the gubbins in one of these case lids, I often wonder how long some of these machines had been out of the shop before they got a dink or two in the finish – particularly if it hadn’t yet occurred to the proud new owner which way round the lid needed to be before they lowered it down to the base …

Singer 201K top tension – part two

Standard

In the previous post on this subject, we looked at how to set up the 201 top tension adjustment.  This time we’ll look at how the other half of the top tension assembly fits together, and see how to adjust both the check spring tension and the position of its stop.

Because it’s the putting back together which gives most folk grief rather than the taking apart, we’ll start with all the components of the top tension assembly removed from the machine.  We’ll go through this on a Mk2, but it’s just the same on a MK1, and don’t worry if reading this explanation scrolls your nerd. It makes more sense when you have the bits and bobs right there in front of you.  Honest.

OK, let’s go!

Here’s a red arrow pointing to the (unscrewed) grub screw by means of which the whole top tension assembly is locked into the machine …

and here’s the tension stud with, in the foreground, the tension releasing pin.  The tension releasing pin lives inside the tension stud and it’s important, because without it, your top tension won’t release when you raise your presser foot and you will be sorely vexed.

In theory, you fit the tension stud by pushing it into the hole in the machine body as far as it will go, making sure that the end of the slot up the middle of it is horizontal, then tightening up that grubscrew to which the arrow’s pointing in the top picture.  That should leave 2mm or thereabouts of the splined part of the stud (the cog-wheely bit) proud of the metal surrounding it.

In reality, it often takes a careful tap with a hammer to make sure that the stud’s properly seated, but don’t hit it unless you’ve first screwed onto it the thumb nut (by means of which you normally adjust your tension) so that it’s level with the end.  That’ll prevent any damage to the threaded part of the tension stud.  It’s probably best to play safe and use a wooden or leather mallet, or hold a bit of wood against the end of the stud then tap (not whack) that with your hammer.

Don’t forget to tighten that grubscrew when you’re sure it’s in right, and note that if you don’t have the slot in the stud horizontal, the datum marking on your tension indicator won’t be at top centre like it should be when you replace it.

Now take off the thumb nut if you put it on, insert your tension releasing pin, and then fit the shiny wossname round the whole works as shown below.  The proper name for the shiny wossname is the Slack Thread Regulator And Tension Thread Guide, but whatever you like to call it, fit it for now with its fixing screw central in the slot.  Incidentally, your tension pin will go in further than the one in the photo above.

We can now move on to the fun part …

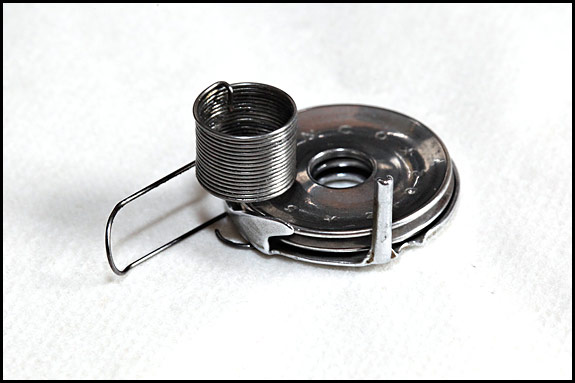
In the picture above we have, from the left, what is properly called the Thread Guard Spring but is commonly called the check spring, then the Thread Guard and then the two tension discs.

Before we go any further, though, check out that little hooky bit which is bent in on the coil of the check spring, for it is that little hooky bit which is the key to understanding both how the check spring works, and how it all goes back together.

OK, so we put the two tension discs together with their flattened faces facing each other, and sit them on top of the thread guard like in the picture above.
Now carefully slide the check spring over your little metal sandwich …

so that we end up with it all looking like this, although it doesn’t matter for now where the loop in the spring is positioned relative to that metal finger (which is another way of saying that when I took this picture, my brain wasn’t paying attention).  What matters is that the flattened sides of the two discs are together, and the big coil of the check spring is on the same side of the discs as the sticky-uppy finger.

So.  There’s the stud in place with its slot horizontal, the pin inside it, and your wossname fitted round it, ready for the rest of the gubbins to go on.  But first …

Just so you can see how this business with the check spring actually works, we’re now going to fit it together with an invisible thread guard and tension discs.  Slide the spring over the tension stud with the loop in it hanging down, ideally between 5 and 6 o’clock, and wiggle it until the little hooky bit inside the coil drops into and slides along one of the grooves in the cog-wheely bit.

Push it in as far as it’ll go, then swing the loop of the spring up to rest on the sticky-outy bit of the shiny wossname as shown above.

The little hooky bit on the inside of the spring is now held in what is likely to be the right groove on the stud (because you fitted the spring with the loop hanging down), so the amount of tension that the spring’s under when you rotate it that quarter turn clockwise onto its rest will probably be about right. But if it isn’t, how do you alter it?  Easy – slide it out and put it back with the little hooky bit in the next groove to the left for more tension, or next to the right for less tension.

Now let’s do this for real.  First of all, check that your presser foot is down and your tension releasing pin is still in place.  Then check that your little sub-assembly looks like this …

and slide the whole lot over the stud, holding the bits together and with the spring dangling down.  The fun bit is then jiggling it all so that the loop of the spring stays hanging down, the finger of the thread guard locates in the hole in the body of the machine, and the little hooky bit on the spring slides along one of the grooves in the stud.

And the last thing to do is swing the loop up …

so that it rests on top of that little stop.

Before you go any further, just check that if you press the thread guard in towards the machine and lift the end of the loop of the spring up a bit, it’s under noticeable tension and it springs back against the stop when you release it.  From here on in, assembly of the remaining parts of the top tension is simply a matter of following the sequence detailed in Part One except we then need to set the position of the Slack Thread Regulator And Tension Thread Guide a.k.a. the shiny wossname.

We fitted that with the fixing screw central in the slot, but we now need to see if it needs adjusting.  There seem to be three schools of thought here.  The first says its position doesn’t really matter so screw central in the slot is OK.  The second says that you slacken the fixing screw, rotate the wossname until the loop of the check spring emerges from behind the tension dial at 9 o’clock, then tighten the screw.

I subscribe to the third opinion, which is that the position of the wossname is correct when the check spring just contacts its stop as the point of a correctly-fitted standard needle is about to pierce a piece of medium-weight fabric held in place as it normally is by the presser foot.

But now, I hear you ask “how much tension should there be on the check spring?”.   Alas, unless you have another machine handy to compare it with, the only sensible answer I can think of is “about as much as there is if you put it together as described above, but if in doubt, more is usually better than less”.

Finally, I ought to point out that at least one respected guide to vintage Singers says to fit a particular 201 tension part that way but in the above I say to fit it this way.  All I know is that this way is what works for me, every time.

Singer 201K top tension – part one

Standard

We keep getting emails along the lines of “What’s wrong with my 201 that I have to have the top tension on 9 to get a reliable stitch?”, so this is an attempt to explain a bit about how this type of top tension adjuster works, and why the number you have it set on isn’t actually as important as many people believe.

As I’m sure you know,  the general idea is that en route ‘twixt spool and needle, the thread passes between two discs which are held together by a spring, and they should keep it under just enough tension to produce the perfect stitch.  However, on most of the older domestic Singers, there’s no scale on the tension adjuster, and that makes trying to repeat a previous tension adjustment a bit of a lottery unless you’ve had years of practice with a particular machine

Now on this and later types of Singer top tension, there is a scale, and while to most people this is a great convenience, to some it’s a source of anxiety.  That’s because their machine sews best with the top tension on 9 or maybe even on 2, and they discover that everybody else seems to have theirs on 5.

So what’s all that about then?  Well, in theory, if your bottom tension is correctly set, you should indeed find that more often than not, you get a perfect stitch with the top tension set at or close to 5.   In practice, though, the fun starts when somebody has previously dismantled the top tension and then reassembled it without setting it up properly.  In that case, it’s very easy to end up with a unit which shows 8 or 9 on the scale when the amount of tension it’s actually applying is the equivalent of 4 or 5.  Confused?  Don’t be.  If we take the thing apart and put it back together, you’ll see how the problem arises – and how to sort it out if it has.

OK, we have here a 201K which happens to be a Mk2 but what the machine is makes no odds.  All we’re interested in is the tension assembly.  Seeing as how this is actually one of Elsie’s own machines, it’s hardly surprising that in normal use she usually has it set at or close to 5.

As you’ll be aware if you have one of these, you can only unscrew the (tension regulating) thumb nut so far.  When you want to take it off, as we do now, you have to unscrew it as far as you can, then push the dial with the numbers on (the tension index flange) away from the nut …

If you keep it pushed in (the end of a screwdriver might help if you’re worried about your nails), you can then unscrew the thumb nut all the way, take it off …

and then remove the dial.  We can now see how there’s a pin on the back of the thumb nut which engages in one of a series of holes in the front of the dial …

It’s that which is the key to setting up these tension assemblies.  But just so you can see what’s what, we’ll continue stripping it as far as the discs themselves.  Behind the numbered dial is a peculiar little washer thingy with a hooky bit on it …

and behind that’s the spring …

Next comes the bit with the + and – on it, which is called the tension indicator …

and that’s as far as we’re going this time.

On the face of it, reassembly is simply the reverse of that sequence, but note that

a)  when you replace the spring, the first (smallest) coil of it should be below the slot in the threaded stud (like in the picture) and

b) when you replace that funny little washer thingy, the hooky bit on it goes at the top, point facing away from the machine.

Where people go wrong is when they replace the numbered dial.  It’s a bit of a faff the first time you do it, but it does get easier with practice.  Here’s how to do it properly, but first a word of warning.  If you have a tendency to have problems with nuts and bolts and threads, have a practice session putting the thumb screw back onto the tension stud before you go any further.  I doubt it’s easy to cross-thread it, but obviously take care.  Once you’ve got the feel for that start putting it all back together but …

1  Check that you have the + and – marks on the indicator at the top, the spring on right way round, and the little hooky bit facing you

2 Put the numbered dial back in place so that the ‘2’ is at the top, lined up with the datum mark between the + and the –

3 Push it inwards towards the machine, hold it there, and carefully thread the thumb screw back onto the stud.   Screw it in until that little peg which sticks out the back of the thumb nut tries to poke into one of the holes in the numbered dial.

4 Release the pressure on the numbered dial and jiggle it about until the little peg pops into one of those holes.

5 Now turn the thumb nut/dial all the way anti-clockwise and see what number is lined up with the datum mark on the indicator.  If it stops on ‘0’, you’re laughing.  If it doesn’t, turn it back to ‘2’, press the dial in again, and turn the thumb nut so that the peg drops into a different hole in the dial.  Now see if the dial stops at ‘0’.

6 When it does, check to see if you actually have zero tension with the dial on 0.  To do this, thread the machine as normal up to the point at which your thread’s through the take up lever, then lower your presser foot.  Set the tension to ‘1’, and pull on the thread which is through the take up lever.  You should just be able to feel some tension, but not a lot.

7 Now set the tension back to ‘0’ and pull again on the thread.  There should now be no tension in the thread.  If that’s the case, turn the thumb screw all the way clockwise and see what number is on the dial.  It should be ‘9’.

8 In the real world, it’s often a case of arriving at a compromise whereby when the tension’s backed off as far as it’ll go, the dial’s close to ‘0’ and there’s no tension on the thread, and when it’s screwed in as far as it’ll go, the dial’s close to ‘9’ and there’s a lot of tension.

9  Just get it as good as you can.  To fine-tune it, simply push in the numbered dial and turn the thumb nut clockwise for more actual tension at that particular position of the numbered dial, and anti-clock for less.

And from all that, it follows that if your machine sews a perfect stitch with the tension set nowhere near 5, all you need do to put things back to rights is push in the numbered dial, then without moving the thumb nut, rotate the dial so that ‘5’ is opposite the datum.  That way you maintain the actual setting for your best stitch, but it’s now ‘5’ on the dial – just like everybody else reckons theirs is!

Singer 201K feed dogs – how to lower them

Standard

In response to public demand (two requests for this in the same week is “public demand” as far as I’m concerned), here’s how to lower and subsequently raise the feed dogs on a 201.  What follows applies to both the Mk1 and the Mk2, and hopefully it’ll be a bit easier to follow than the original machine instructions are.

OK then, let’s do this thing.  You need to swing your machine head up on its hinges, and maybe hold it there with something or other while you furtle about underneath the bed.   When you’ve done this dogs-dropping lark the once, the next time won’t take you two shakes of a lamb’s tail so you won’t need to bother propping it up.

What you’re looking for is this gubbins, which is located just under the front edge of the bed, three inches or so in from the left …

Now, when you want to lower the dogs for embroidery or whatever, the first thing you do is unscrew that knurled screw head, so it looks like this …

The screw might be tight, in which case you can either get a pair of pliers on it or use a wide-bladed screwdriver in the slot in the screw head.  Don’t forget that you want to turn it anti-clockwise!  In theory it will unscrew about as far as in that snap and no more, but on some machines you’ll find that it will unscrew completely and drop out.  Don’t panic if it does – just screw it back in a turn or so.

That’s what it looks like from a different angle, and perhaps you can just see the threaded hole into which that screw was screwed.  Now that’s unscrewed, the wossname with the threaded holes in it and that little arm sticking up is free to pivot downwards, so your next move is to push downwards on the arm, so that the other threaded hole lines up with the screw, as in the following picture …

By swinging that wossname down, you’ve rearranged the linkage so that feed dogs are dropped and they no longer move the work past the needle, and if we look at it square on, the whole thing now looks like this …

And when you screw the screw back in (fairly tight) so as to lock it all in that posiiton, it looks like in the picture below.

That is the “dropped dogs” setting, and you’re done, so you can lower the head back down into its base now and embroider (or indeed darn) away to your heart’s content.  And here for comparison is the same picture but with the normal setting.

Finally, just in case you haven’t realised, the easy way to remember this is that you drop the little arm down to drop your feed dogs.

Another 201K for sale (nearly) and our new bikes.

Standard

Picture of Kalkhoff Agattu Ltd Edition electric bicycle

That’s Elsie’s new bike, that is, with her on it allotment-bound.  It’s a Kalkhoff Agattu pedelec, which is a rather expensive but very high quality German electrically-assisted bicycle.   I’ve got one the same now, only mine’s got my scruffy old half-dead black panniers on it rather than those posh blue ones of Elsie’s.  And in case you’re wondering, the answers to the questions we get asked most often about them are …

Round here we can do 30-35 miles before the batteries need recharging (which uses about 9p-worth of electric), but I’m sure we’d do well over 50 if we moved to the Fens.

The battery’s got a theoretical life of over 1000 charge/discharge cycles, and it’s guaranteed two years (as is the bike).

The motor drives the chain, not the wheels, so it too benefits from the 8-speed hub gears.

The motor supplies one of three levels of assistance – half as much effort as the rider’s putting in, the same, or twice as much – and that’s all worked out automatically by the electronics.

Yes, they are legal in the UK .  They’re bicycles, not electric mopeds, and no, you don’t have to wear a magic hat whilst riding one.

Yes, they are supremely comfortable, and yes the frame is aluminium so no, it won’t rust,.

Yes, the brakes are indeed hydraulic, and no, the lights work off the dynamo on the front wheel, not off the battery.

And no, riding down hills doesn’t charge the battery.

Let’s just say that they’re jolly good, and we now seem to be more or less back on track for The Giving Up Of The Motor Car, about which more in due course.  That’s obviously going to have an effect on our ability to buy-in machines for resale after we’ve fettled them, which leads me nicely on to the subject of 201K’s for sale.

Last Sunday, I was literally a couple of hours away from listing another Mk1 201 on the Singers for Sale page when we got an enquiry from a gent asking did we have one.  Yes we did, it was exactly what he wanted, and it left here yesterday bound for Norfolk.   And no sooner had it left than we got another email from a lady in London town asking … have we by any chance got a nice Mk2 201 for sale?  Yes we have, or to be more precise will have once we’ve given it The Treatment, so at least we know what we’re going to be doing next!

Now, and I kid you not, no sooner had I sorted that out and Elsie was gone in the bath than in comes another email asking – do we have a long waiting list for 201’s?  To which it was tempting to reply “No, but at this rate we very soon will have!”.  But I didn’t, so it looks like we now have two more 201’s pretty much accounted for even before we’ve started work on them.

So, where is this all leading?  To a waiting list, dear reader.  That’s where.  At least for the time being, if you’re after a nice 201K, the way forward is to drop us an email and tell us what exactly you’re in need of.  Specifically, it’s helpful if we know your preference for Mk1 or Mk2 (the difference between them being only looks and 4.5Kg), and how important cosmetic condition is to you assuming that the machine’s 100% mechanically.  It’s also handy to know how bothered you are about the type and condition of its base and case.

Right, I’m off to get the kettle on and then amend the Singers for Sale page accordingly …

Another lovely Singer 201K for sale

Standard

I’ve just put this gorgeous 201K23 on the Singers for Sale page.  I know some people think the black Mk2’s look a bit intimidating compared to the more homely brown/beige ones, but personally I still prefer them.  Maybe that’s a bloke thing, I don’t know.

Whatever, this one’s in really  lovely condition and it sews a treat – and quietly too, because it’s now got a particularly smooth-running motor.  It’s also got the late-type machine plug as well as the male socket with the “split” pins, and that is without doubt the best combination to have.  As always with our electrics, the foot controller’s been checked over, the Singerlight’s been stripped and rewired, and the mains cables are new.

The suitcase-type case it’s in is a far nicer one than most, and it comes with an extension table as well as a full set of attachments.

Here’s another snap of it …

Which way round does the bobbin go in a vintage Singer?

Standard

If it’s a long bobbin for a Vibrating Shuttle machine, it’s easy – you hold the shuttle with the pointed end down, and the bobbin drops into the top of it with the thread coming off from left to right across the front.   If the thread’s coming off from the back of the bobbin, that’s wrong.  It needs to be left to right, on your side.

Yes, I know a picture would have been a great help there, but I forgot to take one.  At this time of year I have to wait for a bit of sunshine in which to take a halfway-decent snap, and more often than not as soon as we get the slightest hint of a blue sky, Elsie drags me into the garden to be her assistant/labourer and by the time I get back inside, put the kettle on and remember there’s a picture I need to take, the sun’s gone in.

Anyhow …

If it’s a round bobbin machine, it depends on what model it is, and if you’re thinking to yourself “does it matter which way round I put the bobbin in?”, the answer is oh yes it does.

Now obviously this isn’t a problem if you only ever use one type of vintage Singer, because you’ll have read the book of words for it and know perfectly well which way round the bobbin goes in it.  But what if you’ve just scrounged the lovely old 66K that Mrs Thing next door but one was about to take to the dump along with her weekly accumulation of empty gin bottles and copies of the Daily Mail and you can’t wait to see if it works?  Or your friend Sally of the School Gate Gang’s got an old Singer which won’t sew properly and she’s asked if you’ll have a look at it for her if there’s coffee and cupcakes involved?  Maybe you have a 99 and a 201 and every now and then you have a brainfart about the bobbins?  Whatever, here’s how you tell which way round the bobbin goes in a pre-mid-1960’s Singer (and for all I know about the later machines, in one of them too).

Check out the bobbin case, which is the proper name for that bit of your machine into which you drop your bobbin.  If you look round the sides of the hole into which your bobbin goes, you will see a diagonal slot in it, like this …

Detail photo of Singer 99 bobbin case

That’s a 66/99 bobbin case (they’re identical), and as you can see, the slot exits the case to the left, or to put it another way, anti-clockwise.

Picture of bobbin in Singer 99 bobbin carrier

And there’s that same bobbin case photographed from the same angle, now with a bobbin in it the right way round i.e. with the thread coming off it anti-clockwise.  Yep, the thread comes off the bobbin the same way that the slot exits the case.

Having got the bobbin in, your next step of course is to pull the thread to the right so it runs under the tension spring and into the notch, then pull it across the top of the bobbin and close your slide plate.

When you do that, you’re actually making sure that the thread leaves the bobbin through the hole at the bottom of the slot, then under the tension spring in exactly the right way for the spring to apply constant tension.  Pulling on the thread pulls it down the slope of the slot, and ensures that it stays in the hole as it feeds off the bobbin.

If your bobbin is in the wrong way round, pulling on the thread doesn’t necessarily slide it down the slot into the hole, so you may well get inconsistent bottom tension.

Detail of Singer 201 bobbin carrier

Now here we have the bobbin case out of a 201, and as you can see, the slot faces the other way i.e. it exits the case to the right, or clockwise.  So which way does the thread need to leave the bobbin on a 201?

Detail photo of thread leaving Singer 201 bobbin

Yep, that’s right.   Clockwise.  OK, I completely forgot to photograph a 15 bobbin case, but you can take it from me that it has a slot in it which provides exactly the same clue as to which way round the bobbin goes.

And that’s it.  All you need to do is take a look at the slot in the side wall of the bobbin case, and that tells you which way your thread needs to leave the bobbin …

Picture of Singer 66/99 and 201 bobbin carriers

66/99 on the left, slot exits anti-clockwise therefore thread comes off the bobbin anti-clock.  201 on the right, slot exits clockwise, so your thread comes off clockwise too, like this …

Picture of Singer 66/99 and 201 bobbin carriers and bobbins

Finally, just in case it hasn’t occurred to you, if you take this information together with what I’ve rabbitted on about in earlier posts, you now know how to put both the needle and the bobbin in any vintage Singer the right way round, as well as which way to thread the needle – and all this without an instruction book.

And by the way, if you’re still tut-tutting about these grotty old bobbin carriers, you should have seen the state of them before Elsie insisted on getting the thick of the muck off …

The studio, buttonholers, a 201K, the harmonium. And logs.

Standard

picture of Singer 201K23 in beige/brown

Detail picture of Singer 201K23

Detail photo of Singer 201K23

Detail of Singer 201K23 stitch length regulator

Well, I finally finished the bathroom cupboard and between us we got it painted (magnolia – we’re not very adventurous where decorating’s concerned).  No sooner had the paint dried than I set up the studio i.e. put the board over the bath, spread out the white hotel tablecloth on it, plonked a sewing machine on top and started snapping away.

And when I came to open the files in Photoshop, I discovered that oh poo the new magnolia-coloured “wall” was now producing a colour cast.  Long story short, the studio has now moved into our bedroom.  The board and tablecloth which sat on the bath now sit on top of The Harmonium, as the later Singer drawing-room cabinet is referred to (‘cos we think it looks like one when the machine’s down and the top’s over), and as long as I time the picture-taking to avoid the direct sun which comes in around noon at this time of year, I have better light now as well as more room to move.

Anyhow, these ‘ere snaps fresh from the new studio are of a really nice 201K23 which we’ve now added to the “Singers for Sale” page, and I’m not saying anything more about this machine now lest I be inclined to go off on one about the way 201’s are hyped up on Ebay.  Having said that, though, I can’t help wondering how come an identical machine to this one seemingly in similar cosmetic condition but with a scruffy case lid has this very evening sold on Ebay for £170!

Whatever, we finally realised over the New Year that we do indeed have a surfeit of buttonholers (you can say that again -E), so I’ve just added a Singer 160506 (the one in the green plastic case) with extra templates, and before much longer I’ll be adding still more to the “Bits ‘n’ bobs” page.

There’s another Swiss zigzagger listed now too, by the way, and I must say you’d be hard pushed to find a better one either here or in the States.

Finally, having for the last two months been burning a load of timber we scrounged from a building site, last week we managed to clear enough space in one of our log sheds for a couple of loads of proper logs from our friendly neighbourhood log lady, and we finished stacking those this afternnon.

In case you ever need to know, I can now tell you with some authority that an average pickup load of mixed hardwood logs cut at 10″ and split consists of about 330 logs, which when stacked one row deep along a wall amounts to 33 square feet of logs, or a stacked volume of 0.7 cubic metre.  And round our neck of the woods, that’s very close to 25p a log, which I guess seems expensive – until you weigh up the advantages of heating by woodburning stove …

Another Singer 201K for sale

Standard

I’ve put another classic 201K on the Singers for sale page, and this one’s a little bit different …

Picture of Singer 201K sewing machine with accessories

This is the 201K3 which until now has been in Elsie’s own collection of portables.  It’s the one I’ve been under orders not to mention when people asked if we have a nice 201 electric for sale.

However, we’ve only got a small house, and with 6 different treadle machines in it which I can’t see Elsie ever parting with, it’s finally been decided that the time has come for some of her portables to go to somebody who’ll put them to better use.  So this one is now for sale.

It’s a little bit different in that we know its history.   The lady I bought from it had recently inherited it from her Mum, who bought it new in 1948.  Apparently it was Mum’s pride and joy, and it was taken into the local Singer shop for a service every two years without fail.    She made her daughter’s Christening gown on it, and in due course her wedding dress too.

After Mum died, it was passed to her daughter.  It was only brought out once, to make a pair of curtains on, then put back in the cupboard.  And there it stayed until it followed me home.

It’s been checked over very carefully indeed and oiled, and I’ve stripped and rebuilt the motor, as well as replaced the mains leads.  This machine is a really sweet runner, and it has one of the quietest motors we’ve ever come across.  Sure it’s got a few superficial bits of pin rash and the odd tiny dink or two, but nothing that stopped Elsie claiming it for her collection as soon as she saw it.

Its “snakeskin” suitcase-type case is a really good one, and we’re including with it all the bits and bobs which came with it when we bought it – original instruction books for the machine and for the motor, oilcan (empty!), a working Singer buttonhole attachment 86662, and a full set of attachments in their card box complete with the list of contents!

Also included is the Singer rubber mat, but I forgot to include that in the pictures …

Picture of 1948 Singer 201K3