Category Archives: Sewing machine maintenance

Electrical safety and old Singer sewing machines – part one

Standard

DISCLAIMER – This post it not written by a professional electrician.  It’s written by a retired bloke who meddles with old Singers, and what follows is nothing more than personal opinion based on experience and, hopefully, a smattering of common sense.

It might help readers to know that I grew up in a house where, as was still common at the time, all the mains sockets were 2-pin.  In other words, there was no provision for earthing anything electrical.  That didn’t stop Mother sometimes taking the chill off the bathroom in the winter (only on the very coldest of nights, mind – she wasn’t made of money!) with a metal-bodied single-bar electric fire placed on the floor a good 5ft away from me in the bath, its lead snaking under the door and into the 2-pin socket just inside my bedroom.  Mother wan’t daft, so I never have worked out whether she was simply confident that 7 year-old me had enough sense not to splash water onto that electric fire when I got out the bath, or whether some pressing issue might have been resolved by my early demise.

Whatever, I grew up with a healthy respect for mains electricity, and have done perhaps more than my fair share of DIY home electrics.  I’ve also worked for several years in the assembly of electrical and electronic products, but I reckon that’s enough background for you to decide how much notice to take of what follows.

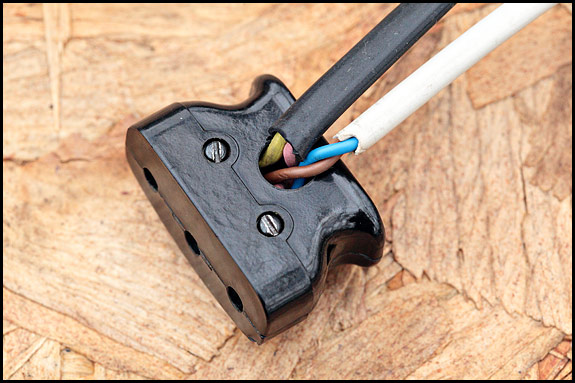
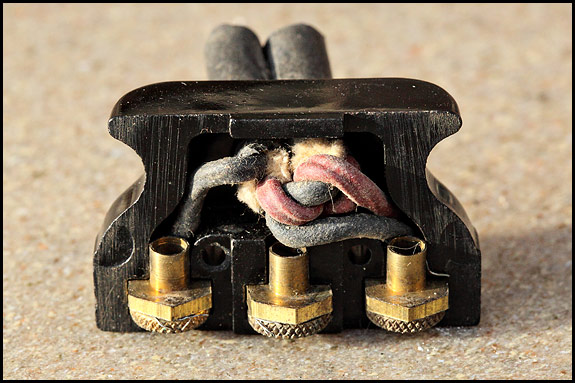
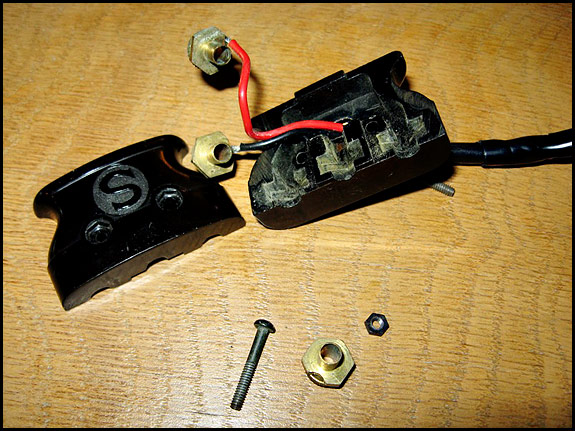
What’s prompted this post is an email I got from one of our readers asking how she should earth her Singer 201K.  Specifically, the question was why, when the original 2-core lead has at some point been replaced by a 3-core one with a 3-pin mains plug on one end of it, is the earth wire not connected at the machine end?  This lady kindly sent a rather good picture of what she found when she undid the Singer connector …

Copy of vintage Singer motor lead connector

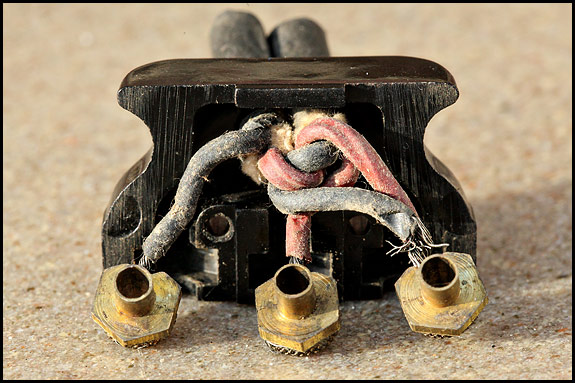
Given that there are three contacts in that connector and only the outer two are wired up, it’s entirely reasonable to suppose that the earth wire should go to the middle one.  After all, that’s what you’ll find if you open up the plug on your kettle or whatever.  But this is a Singer sewing machine that’s at least 60 years old.  Not only were things done rather differently back then, but that machine connector’s also a bit out the ordinary in that there’s only one mains cable going to it.  And the reason for that is that this particular plug goes into a 201 with a knee-lever controller.  If it plugged into a machine with the usual foot-pedal controller, the wiring would be more like this …

picture of wiring of vintage Singer connector

See the red wire going to that centre terminal?  That’s a good clue that it’s not an earth connection.  In fact, the centre connection of these old Singer plugs goes to one side of the motor, and connecting an earth wire to that would not be a good idea, because you would in effect be connecting the live pin of your mains plug to the earth pin of it via the sewing machine motor.

So how, you ask, do you then earth an old Singer electric?  The short answer is that you don’t.  You could do, but unless your foot-pedal and mains leads are permanently wired in as on the 185 and the final variant 99’s, the necessary wiring would look a mess and be a PITA if you wanted to unplug the leads from the machine.

OK then – how to avoid death by vintage Singer?  In my opinion, you need to ensure first of all that when you’re using the machine, you’re plugged into house wiring which has been professionally checked within the last 10 years and has a consumer unit fitted with a good RCD.  If that’s meaningless, see here

You also need to inspect both the mains lead to the machine and the lead from the foot pedal for any signs of cuts or wear in the outer covering, and while you’re at it, take a good look at any visible wiring on the machine itself.  If it looks a bit dodgy, it probably is, and you need to get it sorted.  Similarly, if the wiring going into your machine plug looks something like this, that also wants attending to …

Picture of bad wiring to vintage Singer machine connector

And finally, you can perhaps bear in mind that until Singer started flogging machines with three-pin plugs on the end of the mains leads (towards the end of the 1960’s ?) very few domestic electric sewing machines were earthed, but even fewer users of them were electrocuted.

That’s it for this first part, but there’s more to come on this subject …

Top picture © Colette Granville, used by kind permission
PART TWO can be found here and PART THREE here

Singer 66 and Singer 99 maintenance – that weird oil hole on the top

Standard

I was in the greenhouse yesterday afternoon taking some pictures of the underneath of a 99K, as you do, when it occurred to me to do a quick post about that weird oil hole next to the spool pin …

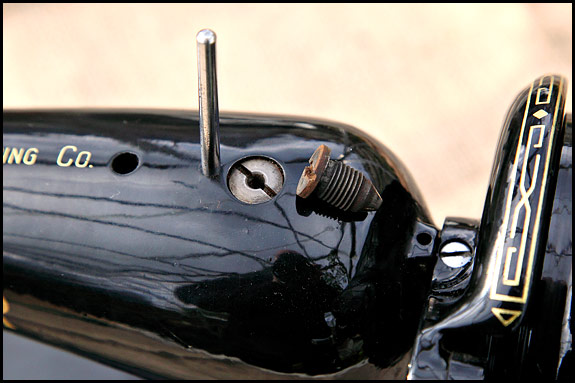
Picture of oil hole on top of Singer 99K

There’s the hole in question, and to its right is a chunky sort of threaded plug with rust on its slotted end.  That’s what that oil hole thing with the slot in looks like if you manage to unscrew it, which in the normal scheme of things is something you’d be ill advised to do.  And in case you’re wondering how come that one on its side is so rusty, it’s because it came from a scrap machine which sat outside the bike shed for a couple of weeks waiting for me to get round to taking it down the dump.  And it rained lots.

Anyhow, why am I rabbitting on about this?  Well, it’s actually quite important that that hole gets its fair share of oil every now and then along with the other oil points indicated in your instruction book.  That’s because there’s a metal shaft runs up to it from the bottom of your machine, and the cup-shaped top end of it mates with the conical bottom of that plug thingy, which acts as a bearing.  Which needs a film of oil on it.   Unfortunately, although that hole is 4mm wide at the top, it’s 13mm deep and only 2mm wide at the bottom – and it’s very often full of crud.  Fluff, bits of matchstick, grot of ages – you name it, we’ve pulled it out of these oil holes.

So what’s to do with it on your machine?  First thing is to realise that although there’s a small hole at the bottom of it, that’s pretty much closed off by the top of the shaft which mates with it.  There’s just enough clearance for oil to seep through, but not enough for the crud to get into the works.  The crud can stop the oil getting where it’s needed though, so the best thing you can do is clear it out, and that calls for some ingenuity on your part.  We use one of our collection of dental probes, but it’s got to be possible with a bent paperclip, hasn’t it?  End straightened out, then about 2mm bent at right-angles?  Or something?  Maybe even poke about a bit to loosen the grot then Dyson it?

Whatever you use, it’s certainly a job worth doing.  So too, come to think of it, is checking with your instruction book while you’re at it that your spool pin is where it should be i.e. that some muppet hasn’t bashed one into an oil hole.  And yes, that really does happen.

There.

I did it.

I got to the end of a post about oil holes and I haven’t said a word about horrible 3-in-1 oil and how it’s evil and despite what they say on the tin it’s anything but ideal for sewing machines and …

The knot in the plug

Standard

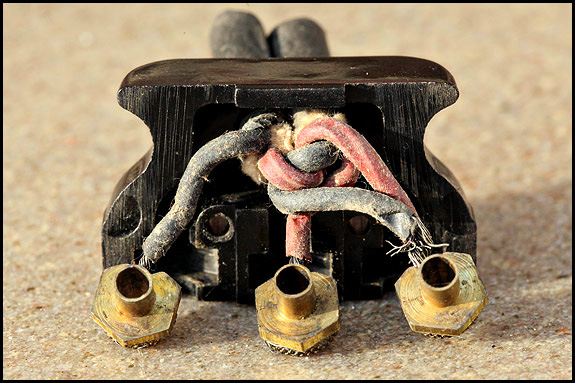
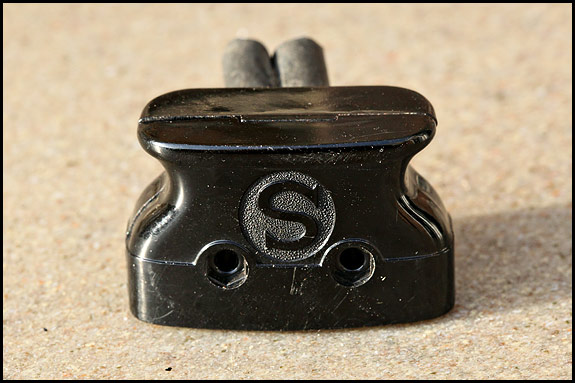
Picture of Vintage Singer motor plug

In case you don’t recognise it, that’s a vintage Singer motor plug of the most common type, shown here without the two screws which hold it together.  In most installations there are two leads connected to one of these – one to the mains plug and one to the foot pedal, and it’s those cut-off leads you see sticking out the back here.

When you consider that all of these plugs are well over 60 years old and many of them are still on the end of the original cables, it’s hardly surprising that most are in a bit of a state inside.  Actually, some of them are downright scary, but that’s something for another blog post.

This one wasn’t too bad as these things go, but I’m in awe of whoever had the patience to knit this little lot with the old rubber-covered wires in such a confined space …

Photo of inside of vintage Singer sewing machine motor plug

Picture of wiring in vintage Singer motor plug

It’s bad enough rewiring one of these plugs with modern cable which is both thinner and more flexible, but to do it with two fat old rubber-covered cables that needed forcing through the hole in the plug body to start with must have been a real PITA.  And in case you’re wondering, the purpose of the knot is to act as strain-relief i.e. to stop the leads pulling out when No 1 child runs past the end of your table at high speed and trips over the mains lead that you’d just told him for the third time to be careful of.

While I’m having an explain here, if you’ve never used a vintage Singer electric, you might be bemused to know that the motor socket lives more or less under the handwheel, and that plug goes into it in such a way that the two leads come out the top of it, not, as you might reasonably expect, out the bottom.  Yes, that does mean that the leads can rub against the handwheel as it rotates at a fair old rate of knots, particularly if the motor bracket’s at the top limit of its adjustment (ie the motor’s as high up as you can get it).  I too think that’s very silly, but apparently the reason they did it like that is so the leads didn’t get in the way of you removing the lid of the storage compartment.

Or so they say.  I’m more inclined to thinking they just screwed up, simple as that, and took far too long to replace that plug with the one which has a cable going in each side rather than two on the top.  It’s a big improvement is that, and it’s actually a bit easier to rewire, for which people like me are truly thankful.

Which way round does the needle go in a vintage Singer sewing machine?

Standard

This is easy.  Honest.  Stick with me to the end of this post, and you’ll be able to saunter up to any vintage Singer machine, take but the quickest of glances at it, and gain the respect and admiration of astonished bystanders by immediately saying whether or not the needle’s in the right way round.  And as I’m sure you realise, that’s a very handy skill to have.

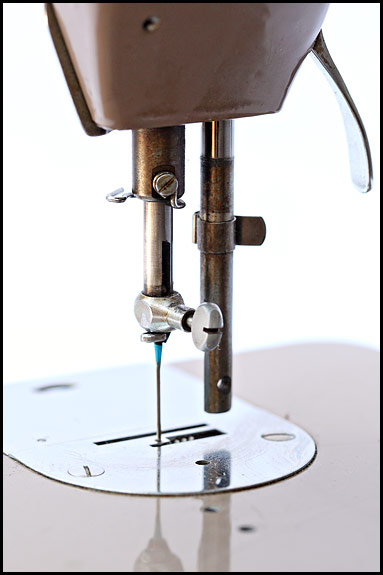
First off though, let’s get the terminology right.  The rod thingy which goes up and down when you sew, and into the end of which you insert your needle, is called the needle bar.  Your needle’s held in the needle bar by the needle clamp, which is what you tighten by means of the clamp screw.  And just in case you’re now wondering what the other rod thingy which doesn’t go up and down but has the presser foot on the end of it is called, it’s the presser bar.

Next we need to consider exactly how the needle fits in the end of the needle bar …

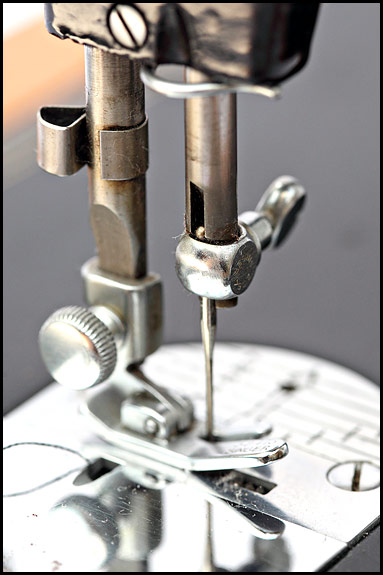
Picture of Singer 99 needle bar and clamp

That’s the needle bar and clamp of a Singer 99K, about which we need to note two things.  One is that the needle bar has a slot in it, here visible above the clamp.  And the other is that just above that clamp, there’s what at first glance seems to be the top of the needle.  Except it isn’t. That little shiny blob is actually the needle stop, up against which you push the needle when you slide it up through the clamp.  That’s what ensures that your needle is set at exactly the right height – as long as you slide it up as far as it’ll go.

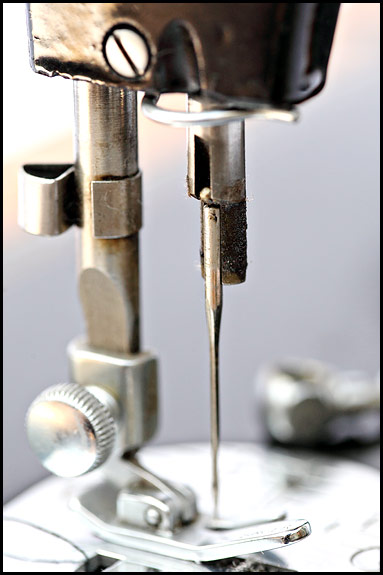
Here’s what it looks like if we take away the needle clamp …

Picture of needlebar on Singer 99 without clamp

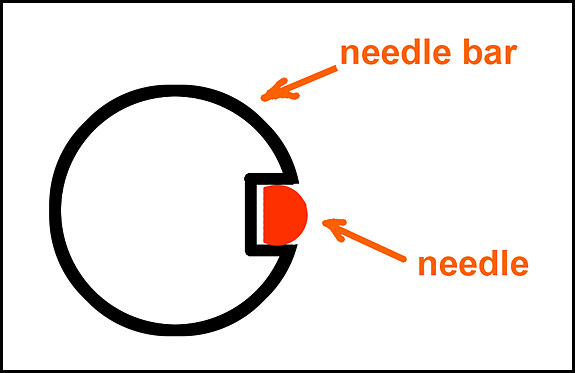
See how the needle actually fits in?  The flat face of the fat end sits against the flat bottom of that slot, so in cross-section it looks like this …

And now you know what determines which way round the needle goes!  It always goes in with the flat on it facing the bottom of the slot in the needlebar.

Going back to that picture at the top, you’ll see that as you’re sitting at that 99, with the screw of the needle clamp pointing to your right, the slot in the needlebar faces left.  Therefore the needle goes in with the flat side to your right, which is actually the most common way round.

Now check out this picture of a rather mucky beige 201 Mk2 without a presser foot …

Picture of Singer 201K Mk2 needle bar and clamp

This time we’re looking towards the left-hand end of the machine.  The clamp screw still faces the right-hand end just like on the 99, but golly gosh – the slot in this needlebar faces right too!  Yep, the needlebar on a 201 is indeed the other way round, which of course means that on a 201, the needle goes in the other way round i.e. flat to the left.

We could actually complicate matters by considering that some needlebars have slots in them which face forward (towards you as you’re sewing), but those didn’t appear until after the rot set in and Singer started making the newer machines, so I’ll keep things simple and not mention them.

So, you now know that it really is easy to tell which way round the needle goes in a vintage Singer.  All you have to do is check which side the needlebar slot faces, then fit the needle so that the flat on it sits against the bottom of the slot.

Next week’s thrilling instalment is tentatively entitled “Now You Know Which Way Round The Needle Goes, How Do You Tell Which Way To Thread It?” …

Singer 66 and Singer 99 slide plate – how to remove and replace it

Standard

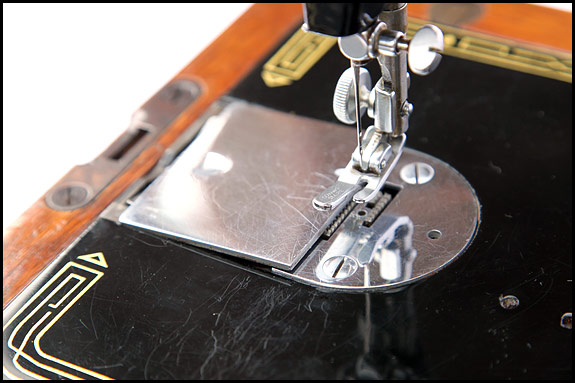
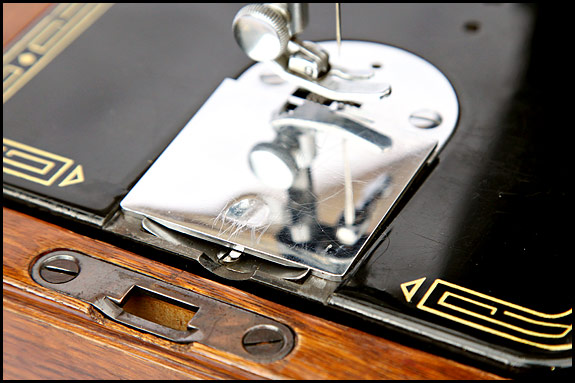
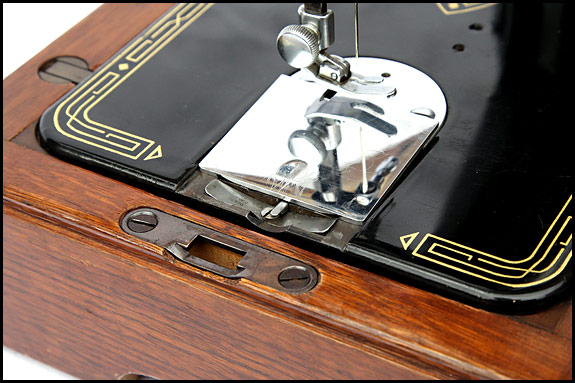
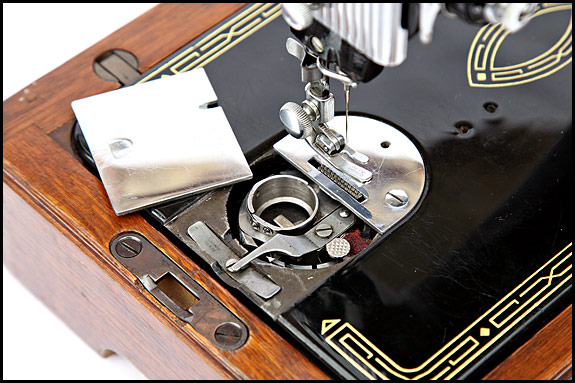
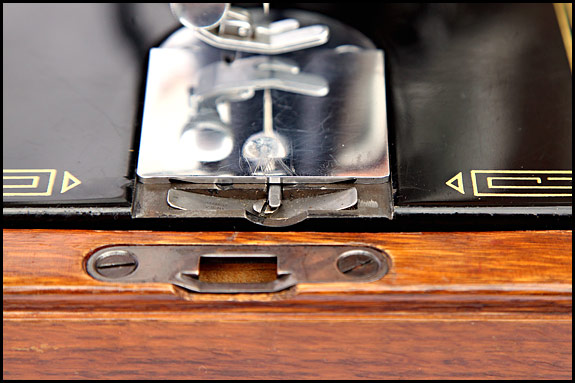
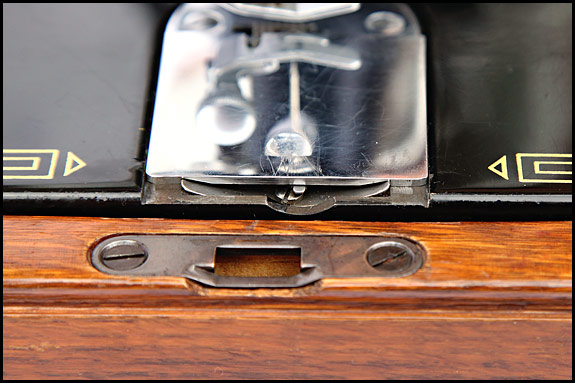
The slide plate is the chromed steel plate which slides open to reveal the bobbin in its carrier.  Some folk call it the bobbin plate but it’s not – it’s the slide plate, and judging by the number of vintage Singers out there without one, a lot of people force it off, can’t get it back on, and lose it.  Here’s how not to do the same thing yourself.

For starters, let’s see how to remove it, and in the process, discover why you can’t (or at least shouldn’t be able to) slide it right off …

Picture of Singer 99K slide plate partly open

There’s the slide plate slid open a bit, in the same way that you’d slide it open to change your bobbin.  To take the slide plate off, you need first of all to turn the machine’s handwheel towards you until the needle is at its highest point. Then, lift the end of the plate which is nearest the needle up a bit (like 3mm or 1/8th inch) against the pressure of a spring which you can’t see.  This works best if you only open the slide plate 1cm or so like in that picture, but the main point to watch is that you don’t pull it up any higher than you see in the picture below.  All you’re aiming to do is slide the plate over the other one.

Picture of Singer 99K Slide plate raised for removal

There’s actually a bit of Photoshoppery in the picture above because in reality, the plate will only stay like that with your finger holding it up.  Anyhow, it’s this next stage which sounds a bit of a faff (or if you’re German, a pfaff) but it isn’t really.  Actually doing it is not complicated at all.

Having lifted the end of the plate up a bit, you now need to keep it raised while with your other hand you push the plate towards the needle.  What you want is for the slide plate to ride up, first over the other plate (the needle plate), then as you keep pushing it along, over the first feed dog it comes to, like this …

Picture of Singer 99 slide plate slid forward onto feed dog

While you have the plate in that position,  the other end of it will look just like in the picture below.

Picture of Singer 99K slide plate and retention spring

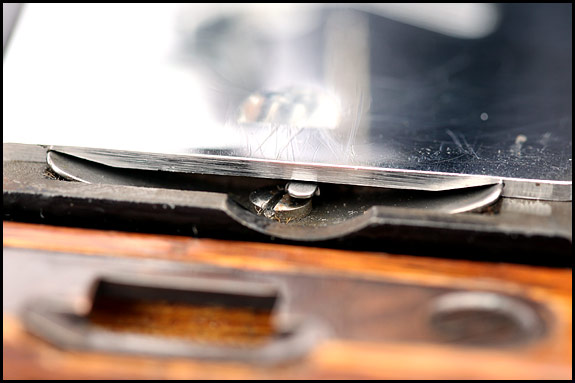
And there you finally see what holds the slide plate in!  Yep, it’s that double-ended spring.  See how the two grooves in the underneath of the slide plate fit over the ends of the spring?  No?  OK then, just for you …

End view of Slide plate of Singer 99K and spring

Now you’ve seen that and you understand how it fits in, it won’t come as any surprise at all to find that if you push the slide plate just another 3mm or so towards the needle, the back end of it clears the spring …

Picture of Singer 99 slide plate removal

Et voilà – you’ve successfully removed the slide plate of a Singer 99 (or indeed a 66 ‘cos it’s just the same)!

Picture of bobbin area of Singer 99K with slide plate removed

And at this point I should have taken another snap to illustrate why when you slide open the slide plate normally, you can’t slide if off the end of the machine.  But I forgot to.  No biggie though – if you turn your slide plate over, you’ll see the reason.  That’s right – those grooves which fit over the ends of the spring don’t go all the way along the underneath of the plate, which is why you have to take it off the other way like you just did.

Replacing the slide plate is easy.  Drop it in place (the right way round) with the end nearest the needle over the feed dogs, and line up the grooves in the other end with the ends of the spring, like this …

Picture of Singer 99 slide plate replacement

then wiggle it over the spring ends like this …

Photo of Singer 66 or 99 slide plate replacement

and then keep pushing towards the end of the machine until it drops into place.  Job done!

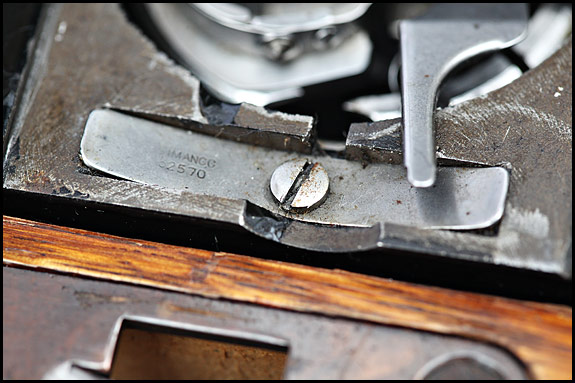
Finally, a Dire Warning.  Here’s a picture of the magic spring with that arm thingy swung out of the way so you can clearly see the screw which holds it in place …

Picture of Singer 66 and 99 slide plate spring retaining screw

Judging by the size of that screw head, you would think that it’s on the end of a fairly normal kind of a screw.  But it is not.  Oh no.  Not at all.  That screw is a really skinny little thing, which is very easily snapped off by the over-enthusiastic application of a screwdriver.  When it snaps, it can be a real PITA to extract in order to replace it so that the spring is held in place and your slide plate will stay put.

If that spring is loose on your machine, take it very easy indeed when tightening that screw …

“Your Singer needs new brushes, madam”

Standard

Or “It’s yer brushes, lady”, depending on how thick the carpet is in the shop.  If there is one.

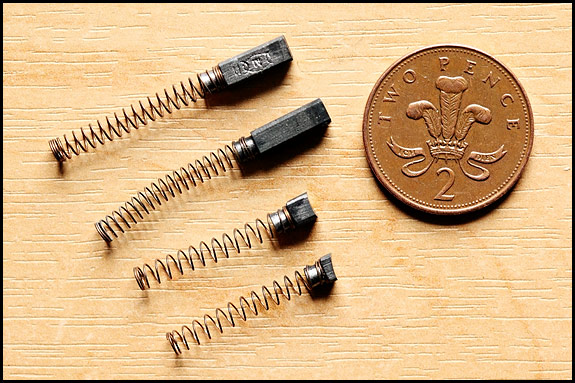
But what does it mean?  Well, first off we need to know what brushes are.  They are bits of carbon on the end of little springs, and here’s a picture of two pairs of brushes from vintage Singer motors.  The top pair are more or less new, and the bottom pair are past their best before.

Picture of two pairs of Singer sewing machine motor brushes

The motor on your vintage Singer has two of those brushes, and their purpose is to conduct electricty from wires which don’t move to a bit of the motor which does, in order that the motor might turn and drive your sewing machine.  That particular moving bit of the motor is called the commutator, it’s a kind of rotary switch made of copper segments, and it lives on one end of a shaft at the other end of which is the little pulley with your drive belt on it.  Those springs push the carbon against the commutator, which is whizzing round at a fair old rate when you step on the go-faster pedal, so not surprisingly the carbon very slowly wears away.

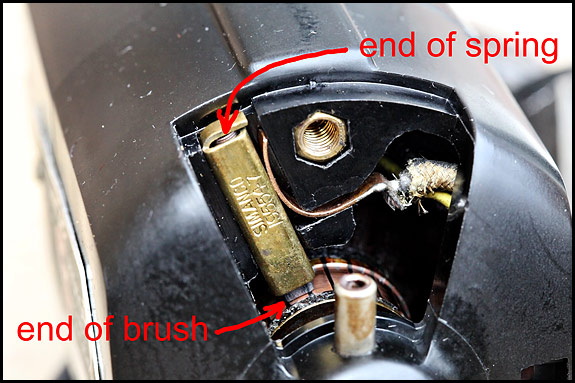
How it works in practice is that the brush itself and its spring live in a square brass tube with a closed end against which the spring presses, and that fits in the motor like this …

picture of motor brush and commutator of vintage Singer sewing machine

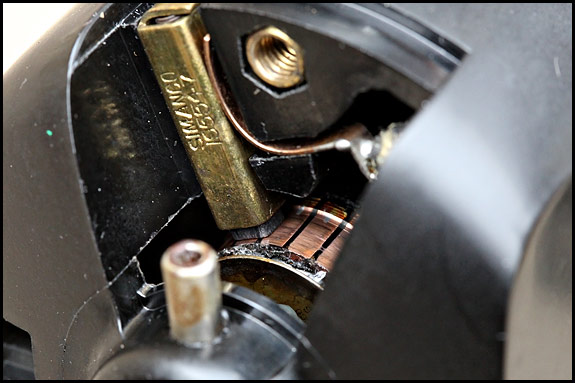
It’s held in place by that curved bit of phosphor bronze, to bottom end of which is soldered that wire with the hairy insulation on it, which as far as we’re concerned here goes to your foot pedal.  That’s how your expensive electricity gets from there to the rotating commutator, which is that copper-coloured segmented thingy under the end of the brush.

It’s a bit of a pig to photograph clearly, so here’s a slightly different view at no extra charge …

Picture of brush and commutator of Singer sewing machine motor

So now you know far more about Singer motor brushes than most people do, and if you run a vintage Singer electric, sooner or later this new-found knowledge will come in handy.  How so?  Well, when one day you notice that your machine is making a funny metallic noise and your investigations confirm that it’s coming from the motor, you won’t need me to tell you that it’s yer brushes.  They have worn out, and if you keep trying to run your machine like that you will do it No Good At All.

New brushes are readily available online at £3.50 or so a pair including p ‘n’ p, and it’s not a big job to change them.  So, you ask, is it a DIY job then?  Well, if you’re possessed of an ordinary screwdriver, common sense, patience and an affinity for things like this, I can’t see any reason why not.  If you look at the back end of the motor, you’ll see at the top and at the bottom a screw head hiding down a hole.  Undo the top one, take it out and you’ll see that a section of the casing lifts off, revealing exactly the view in those pictures above.

What you need to do is ease that square brass holder out, taking care not to let the brush and spring drop into the innards of the motor.  Having successfully extracted the brass thingy and removed the spring and dead bush, take a Q-tip, soak it in lighter fuel, meths, vodka or even WD-40, stuff it up the open end, pull it out and marvel at the amount of carbon dust that was in there.  Repeat as necessary, but it doesn’t have to be clinically clean.  Then insert your nice shiny new brush and spring into the brass thingy, and reassemble right way round.  Which, though not difficult, is admittedly easier said than done the first time you try.

But fear not, because if you screw up, you have these pictures to refer to, and you also have a real life example of the correct assembly.

Oh yes you do.

You haven’t touched the bottom one yet and that’s identical …

Ooooh … look what the postie’s just brought!

Standard

picture of jiffy bag and screwdriver bits from brownells

How exciting!  My new screwdriver bits have just arrived, all the way from Montezuma, Indiana, US of A.

Check out the size of the Jiffy bag they came in compared to my dumb phone that’s on top of it. All that was in it was those two screwdriver bits, each in their own little plastic bag, plus a copy of the invoice.

They are really lovely screwdriver bits though, beautifully made, and they’re the exact sizes needed to fit the two Singer screw heads not properly covered by my existing selection of bits.  So I’m a happy bunny this morning, especially as now it’s stopped raining so I can get out on my bike.

Yes, to get tools of this quality, I really did have to order them from a gunsmiths suppliers on the other side of the Atlantic, because nobody makes this class of gear in this country any more, and in case you’re wondering, the answer is an entirely reasonable $5.98 for the two bits plus $7 post ‘n’ pack.

Basic sewing machine maintenance – Singer 27K and 28K

Standard

Diane asked this morning what she ought to do about tickling the tappets of her late granny’s Singer 27K which she’s just rediscovered.  The machine still works, so there’s obviously nothing drastically wrong with it, and Diane’s done the sensible thing and downloaded a copy of the book of words, so the question is – should she be doing anything by way of essential maintenance before she starts doing some serious sewing with it for the first time in 40 years?

Well, in my opinion the short answer is “not a lot really”.  I’d start by tilting it back in its base and seeing what the underneath’s like.  If it’s covered in oil and fluff, an old paintbrush will get rid of a lot of that, but if you really want to go to town, a bit of paraffin or a squirt of WD40 on a rag should shift anything you don’t like the look of.  One thing to watch though when you tilt it back on its hinges is that the whole lot doesn’t tend to roll over onto its back, which can lead to fun times if it does – especially if it’s come loose on the hinges.  And beware of old rusty pins and bits of broken needles whilst furtling about under there.  Once you’ve got rid of anything really oily or a bit yukky underneath, get the Hoover out, but before you attack it here’s a couple of tips.

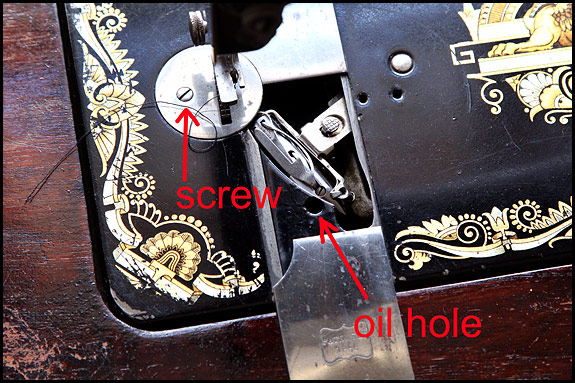
First off, if you open the bobbin plate, you will see the hole shown in this snap …

Picture of area under bobbin plate of Singer 27K

Either that hole will have nothing in it except general grot, or it will have a plug of felt which may or may not be oily.  Odds on it isn’t oily.  If it does have  a plug of felt, that will probably be a very nondescript colour and may not even be recognisable as felt, but if it’s level with the top of the hole it usually is.  That’s an oil wick, and it’s referred to in the manual.  The picture above is the bobbin area of Cleo, Elsie’s 27K treadle machine from 1900, and Cleo is feltless on account of I haven’t got round to putting a new one in.  It’s been on my list for ages and it will happen one day, but Elsie is wisely not holding her breath.

My point is (hey, we got there) that if there’s something in that hole and you reckon it looks like a felt plug, be sure to put your finger over it before applying the nozzle of your vacuum cleaner.  If you don’t, you will soon feel a bit of a silly and wish you had.  And don’t ask how I know that.

The second tip concerns the needle plate, under which live the feed dogs, which tend to accumulate fluff.  If you have a screwdriver which fits the needle plate screw (labelled above) properly, have a go at unscrewing it while pushing down fairly hard on the screwdriver so it doesn’t chew up the slot in the screw.  If it doesn’t want to turn fairly easily, either you’re turning the screwdriver clockwise when you should be turning anti-clock or it’s being awkward.  If it does start unscrewing, take it out, take the plate off and do your thing with the Hoover (but don’t suck the screw up it) before replacing it.  If the screw doesn’t want to play, stick your tongue out at it and don’t worry about the fluff for now.

After that, all I would do is follow to the letter what it says in the book about routine oiling, then make yourself a nice cup of tea before knocking up a quick copy of Kate Middleton’s wedding dress for next door’s eldest.

I’m assuming, by the way, that Diane’s Singer 27 is a hand-crank.  If it’s a treadle, there’s a bit more to think about which I can cover in another post.  If it’s been motorised, there’s not a lot you can actually do yourself to improve whatever state the motor’s in, especially when poking round wiring which is bound to be fairly brittle with age is never a good idea.  It is a good idea to check the drive belt though, and to think about getting another before it goes the way of all drive belts.  You can get the belts pretty much anywhere.

Finally, a warning.  If you’re not familiar with proper sewing machine oil, be aware that it’s very “thin” and runny stuff.  Newspapers under the machine and some kitchen towel in the bottom of the base is the rule here before we even get the oilcan out!

PS If you have an early 27 or 28 and you’re wondering why yours doesn’t have that round criss-crossed button thingy seen in the picture above at 2 o’clock to the shuttle, that’s because yours hasn’t been modified with the later shuttle lifter-upper like this one has …

3-in-One oil is evil

Standard

When I come to power, one of the first things to happen will be the introduction of a total ban on the general sale of 3-in-One oil.  People will still be able to buy it to cure squeaky door hinges or whatever, but only if they sign a properly witnessed form by which they solemnly undertake never to even think about applying it to any part of a sewing machine.

I do wish the firm which makes it wouldn’t push it as suitable for sewing machines, because it most definitely is not.  It is totally unsuitable.  I don’t know what they put in the stuff, but I do know that over the years some of its constituents evaporate and they leave behind a horrible hard waxy brown residue ideal for gumming up the works of an old machine.  Which is exactly what it does.  And it is a real PITA to remove, which is why I’m grumpy about it.

Please, gentle readers of this blog, promise me that you’ll never use anything but proper sewing machine oil to oil a black Singer.  It’s the least you can do for it.

And if your excuse for reaching for the tin of 3-in-One is that your machine is grinding to a halt, you haven’t got any sewing machine oil and Waitrose don’t sell it therefore you can’t buy it, just search Ebay for “Singer oil” and take your pick of several suppliers who will be pleased to send the postie your way with a bottle of it which will last a lifetime for less than a fiver including p&p, which, if our experience is anything to go by, is what your local sewing machine shop would charge you for one – if you had a local sewing machine shop.

Fluff #1

Standard

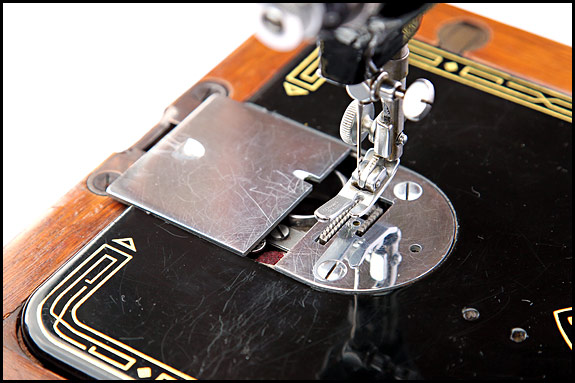
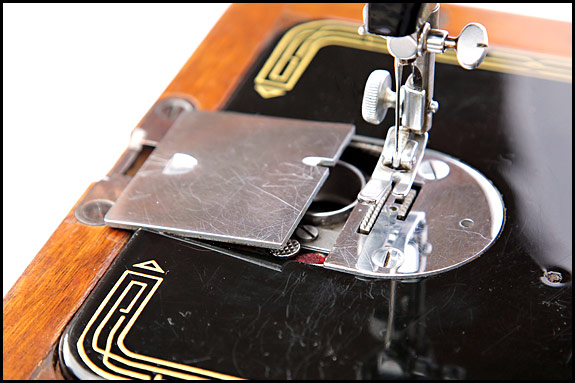
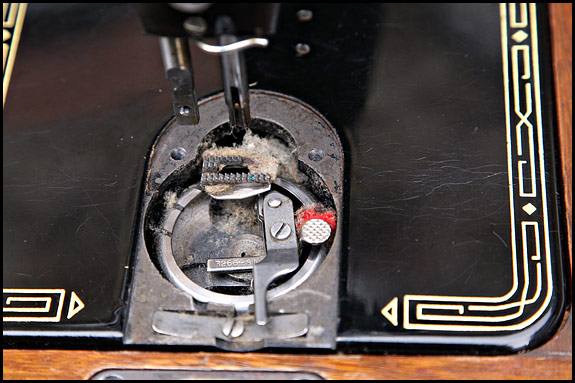
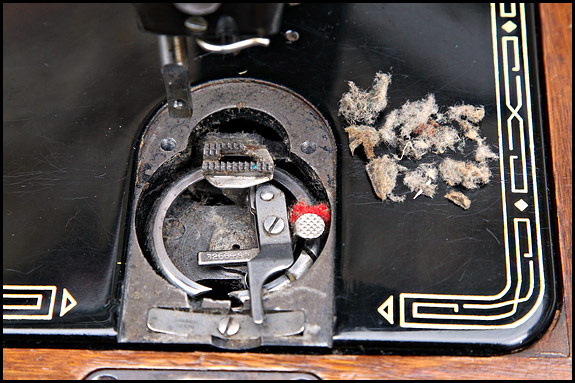
fluff under needle plate of Singer 99k sewing machineAbove we see the very ordinary amount of fluff under the needle plate and around the bobbin carrier of this otherwise well looked after Singer 99, and  below is what came out with just a quick poke round with the tweezers without any further dismantling.  Note that bit of broken needle in the fluff nearest the camera, also the bone-dry red felt which is supposed to be kept oiled but very rarely is.

fluff from under needle plate of Singer 99k sewing machineBy the way, this post is Fluff #1 simpy because there’s bound to be more to come …